Learn to make a zipper pouch with a beginner-friendly tutorial, following simple steps to prepare fabric and zipper, and sew a neat pouch with a zipper stopper using easy techniques and tools available․
Getting Started with the Basics
To get started with the basics of a zipper pouch tutorial, it is essential to understand the fundamental concepts and techniques involved․ This includes learning about the different types of zippers, fabrics, and tools required for the project․ A zipper pouch is a simple and practical bag that can be used for storing small items, and with the right guidance, anyone can create one․ The first step is to gather all the necessary materials, including the fabric, zipper, and sewing machine․ It is also crucial to have a clear understanding of the sewing techniques and patterns involved․ By following a well-structured tutorial, beginners can easily learn the basics of making a zipper pouch and create a beautiful and functional bag․ The tutorial should provide a step-by-step guide on how to prepare the fabric, sew the zipper, and finish the pouch․ With practice and patience, anyone can master the basics of making a zipper pouch and create a unique and stylish bag․ The basics of a zipper pouch tutorial are the foundation of the project, and understanding them is vital to creating a successful and professional-looking bag․

Understanding Recessed Zippers
Recessed zippers have fabric on sides, making openings nice and big, requiring the ends to be finished for a professional look and functional zipper pouch․
Constructing the Lining for a Bigger Bag
To construct the lining for a bigger bag, you can use a similar fabric to the outer layer, making it almost invisible when looking at the bag․ This technique allows for a recessed zipper, which is sandwiched between the lining and the outer fabric, creating a clean and professional finish․ The lining is made by cutting two pieces of fabric to the same size as the outer layer, and then sewing them together, leaving a small opening to turn the lining right side out․ Once the lining is complete, it is placed inside the outer layer, and the zipper is sewn in place, making sure to leave enough room for the zipper to move freely․ This method is ideal for larger bags, as it creates a sturdy and durable lining that can withstand heavy use․ By following these steps, you can create a beautiful and functional bag with a recessed zipper․ The result is a bag with a professional finish, perfect for everyday use․

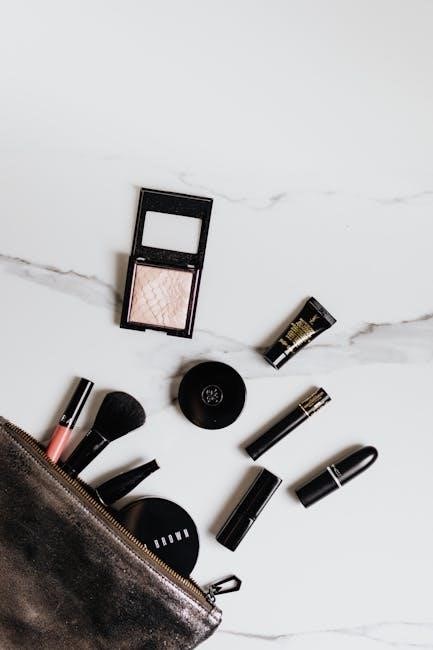
Materials and Tools Needed
Fabric, zipper, sewing machine, and thread are essential materials and tools needed to complete the project successfully and efficiently every time․
Lined Zip Pouch Supplies
To make a lined zip pouch, you will need a few basic supplies, including fabric for the outer and inner layers, a zipper, and thread to match your fabric․
You will also need a sewing machine and some basic sewing tools, such as scissors and a seam ripper․
Additionally, you may want to use some interfacing or stabilizer to give your pouch some extra structure and support․
It’s also a good idea to have some zipper tabs or zipper stops on hand to finish the ends of your zipper․
With these simple supplies, you can create a beautiful and functional lined zip pouch to use for storing small items․
You can choose from a variety of fabrics and colors to match your personal style and preferences․
By following a simple tutorial or pattern, you can create a lined zip pouch that is both stylish and useful․
With a little practice and patience, you can create a professional-looking pouch that you will be proud to use and show off to others․

Step-by-Step Sewing Guide
Follow a detailed sewing guide with easy steps and photos to create a zipper pouch with a professional finish and functional design using simple techniques․
Preparing Fabrics and Sewing the Zipper
To prepare the fabrics, cut two main pieces and two lining pieces to the desired size, making sure to add a seam allowance around the edges․
The next step is to place the zipper on the right side of the fabric, aligning the edges carefully;
Then, sew the zipper in place using! a zipper foot or a regular foot, backstitching at the beginning and end of the seam to secure it․
Make sure to leave a small gap at the end of the seam to turn the pouch right side out․
It is also important to press the seams as you go to avoid bulkiness and ensure a professional finish․
By following these steps, you can create a beautiful and functional zipper pouch with a secure and sturdy zipper․
The key to a successful zipper pouch is in the preparation and sewing of the fabrics and zipper, so take your time and make sure to get it just right․
With practice and patience, you can create a zipper pouch that is both stylish and functional․

Finishing Touches and Tips
To add a professional finish to your zipper pouch, consider adding a zipper pull or a small tab to make it easier to open and close․
You can also add a small pocket or compartment to the inside of the pouch for extra storage․
Using a serger or overlock machine to finish the seams can also give your pouch a clean and polished look․
Additionally, you can topstitch the edges of the pouch to add a decorative touch and reinforce the seams․
It’s also important to make sure the pouch is fully turned right side out and pressed well to give it a crisp and clean finish․
By following these tips and adding your own personal touches, you can create a unique and functional zipper pouch that meets your needs and showcases your sewing skills․
With a little practice and patience, you can create a beautiful and professional-looking zipper pouch that you can use and enjoy․
The finishing touches can make all the difference in the overall appearance of your zipper pouch․